Brother Printers
Brother Printer
Test Page
Print this Brother-optimized test page to diagnose print quality issues on any Brother inkjet or laser printer. Check color accuracy, text clarity, drum condition, toner coverage, and ink flow — tailored specifically for Brother MFC, HL, DCP, and INKvestment Tank printers.
BROTHER TEST PAGE PREVIEW
Below is a preview of the Brother printer test page. Click print to get the best results.
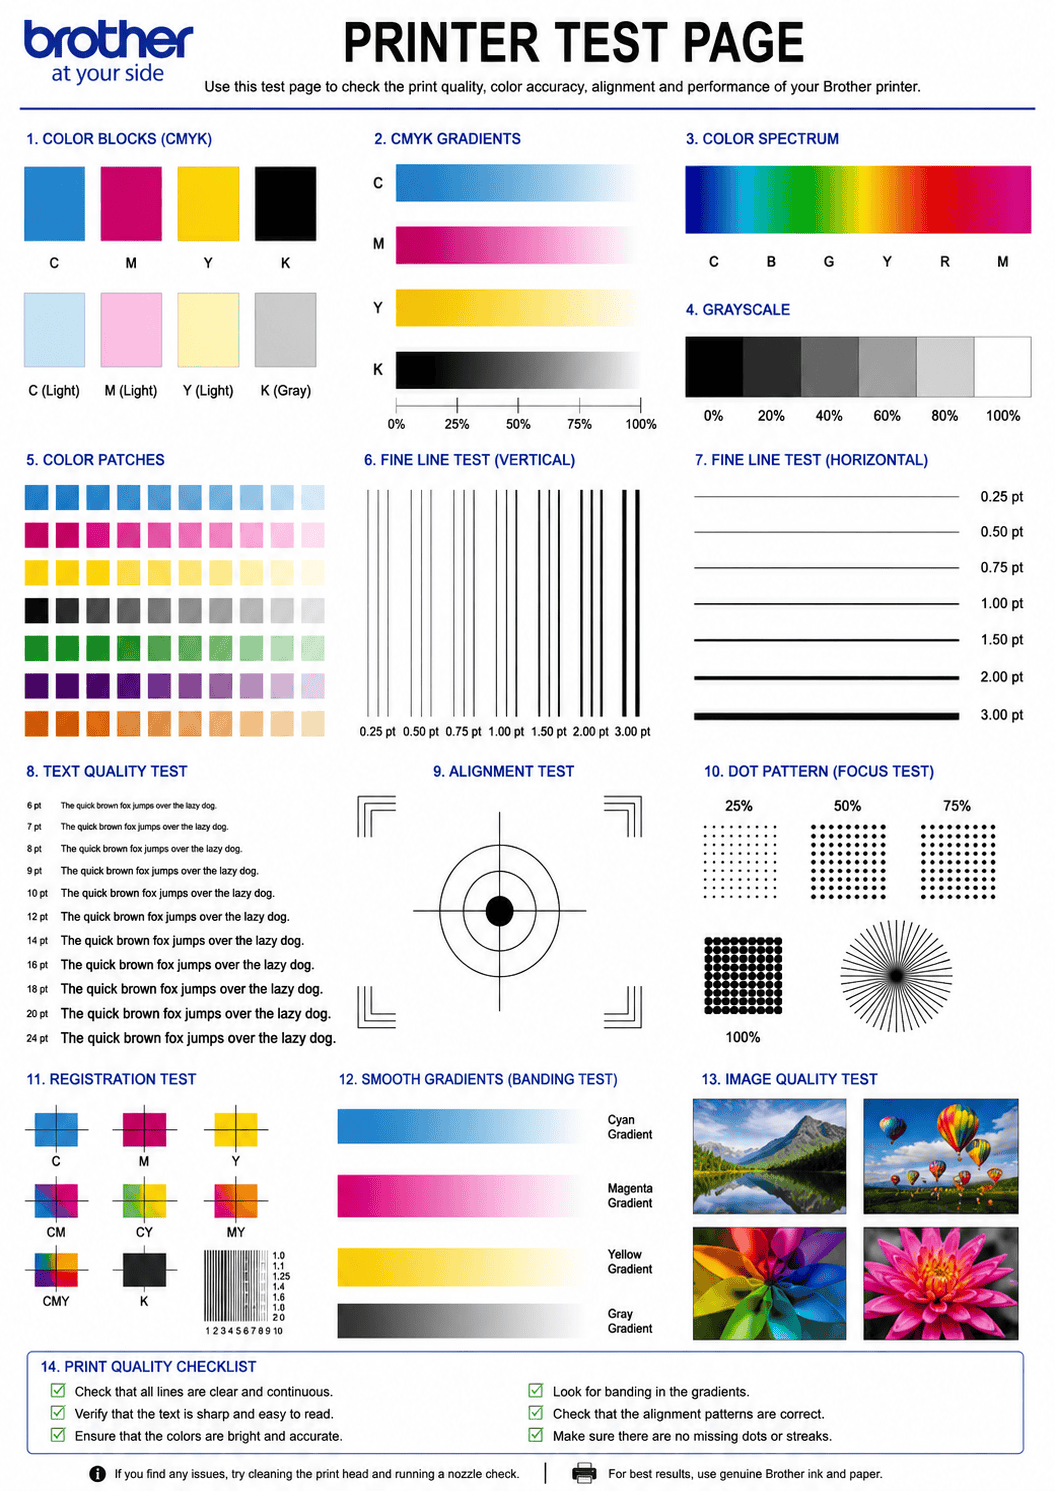
WHAT DOES THIS BROTHER TEST PAGE CHECK?
This Brother-specific test page evaluates every critical aspect of your Brother printer’s output quality and hardware health.
Brother Color Accuracy
Verify that all Brother ink or toner colors — including LC and TN series supplies — print accurately without shifts or casts.
Text & Font Clarity
Test text rendering at multiple sizes to detect blurry characters, toner scatter, or broken fonts on Brother laser and inkjet models.
Drum & Fuser Condition
Check for drum wear marks, fuser scratches, or repeating defects on Brother HL and MFC laser printer output.
Ink Flow & Nozzle Health
Detect clogged nozzles, missing lines, and ink flow problems specific to Brother MFC-J and INKvestment Tank models.
Toner & Ink Density
Inspect solid fills for even coverage — spot pinholes, streaks, or light patches in Brother laser toner or inkjet output.
Gradient & Banding
Evaluate smooth tonal transitions to detect visible banding, posterization, or uneven density in Brother print output.
HOW TO READ THE RESULTS
BROTHER PRINTER SERIES TROUBLESHOOTING
Brother MFC-J & INKvestment
Home and office inkjet all-in-ones. Common issues: clogged nozzles from infrequent use, ink not recognized after refill, paper jam in ADF. Run Print Quality check from Ink menu and clean the head up to 3 times if gaps appear.
Brother HL & DCP Laser
Mono and color laser printers. Common issues: toner streaks, drum wear marks at regular intervals, ghosting, fuser roller contamination. Shake toner cartridge gently, clean the corona wire, and check parts life from the Machine Info menu.
Brother MFC-L Laser All-in-One
Business laser multifunction printers. Common issues: color registration misalignment, duplex skew, belt unit wear, high-volume drum degradation. Run Color Registration from Print Reports and check belt/fuser life counters regularly.
RELATED TEST PAGES
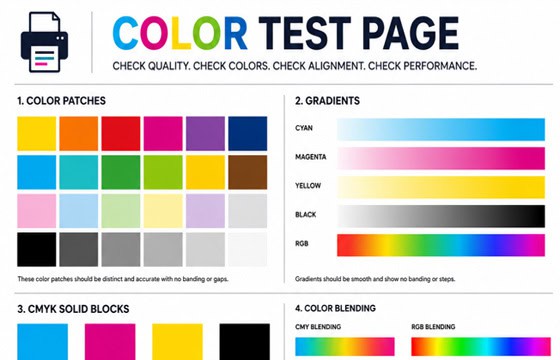
Color Test Page
Full color accuracy and quality check.
View Page →
Black & White Test Page
Test black ink density and sharpness.
View Page →
Alignment Test Page
Verify print alignment and margins.
View Page →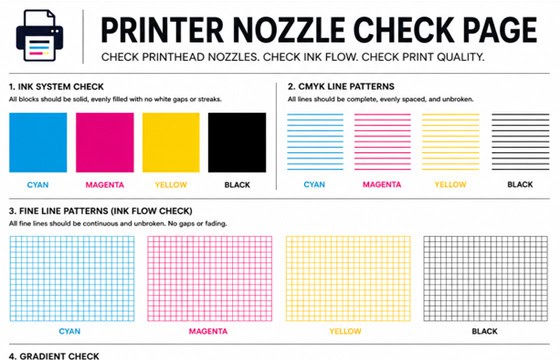
Nozzle Check Page
Detect clogged nozzles and gaps.
View Page →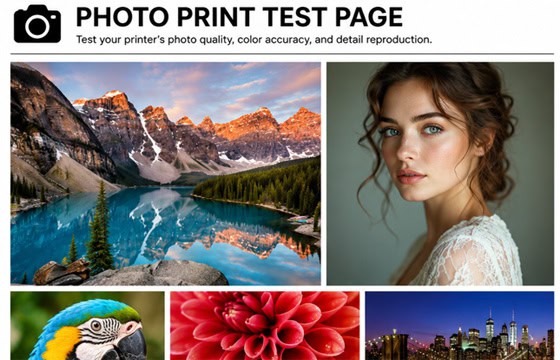
Photo Print Test Page
Test photo quality and color depth.
View Page →Frequently Asked Questions
You can print a test page directly from this website by clicking the “Print Test Page” button above. Alternatively, print Brother’s built-in test page from the printer itself: on touchscreen models, go to Menu > Print Reports > Print Quality or Nozzle Check. On laser models without a touchscreen, press the Go button for about 2 seconds until the LED starts blinking. You can also use the Brother iPrint&Scan app on your phone or computer to run diagnostics remotely.
Repeating marks at regular intervals on Brother laser printers are almost always caused by the drum unit (DR series). Brother separates the toner cartridge (TN) from the drum unit (DR), and the drum has a longer but finite lifespan. Marks repeating every 3.7 inches (94mm) indicate a drum issue. First, try running Menu > Maintenance > Drum Cleaning. Also clean the corona wire by sliding the green tab inside the drum unit back and forth 5–6 times. If marks persist, the drum unit needs replacement — check its remaining life under Menu > Machine Info > Parts Life.
Brother laser printers use a two-component system: the TN toner cartridge holds the toner powder that creates the image, while the DR drum unit is a photosensitive cylinder that transfers toner onto paper. The toner cartridge (TN) typically lasts 1,000–3,000 pages and needs replacing more often. The drum unit (DR) lasts much longer — usually 12,000–50,000 pages depending on the model. When you get a “Replace Toner” message, only the TN cartridge needs changing. A “Replace Drum” message means the DR unit has reached end of life. Always replace them separately unless a combo pack is more cost-effective.
Yes, you can usually continue printing after the “Drum End Soon” warning appears — this is an estimate based on page count, not actual drum condition. However, print quality may gradually decline with spots, streaks, or faded areas. Use this test page to monitor output quality and replace the drum when defects become noticeable. The “Replace Drum” message is more urgent and means the drum has significantly exceeded its rated life. At that point, continued use risks poor print quality and potential toner leaks inside the machine. Brother recommends replacing the DR drum unit promptly after this message appears.